

Quality Check for Custom Team Gear: 7-Step Guide
Table of Contents
- Why a Quality Check for Custom Team Gear Matters
- Build Your Custom Team Apparel Quality Checklist
- Custom Uniform Sample Approval Before Full Production
- Team Jersey Printing Quality: Names, Numbers, and Logos
- Using a Custom Apparel Size Chart to Check Fit
- Fabric, Stitching, and Construction Checks
- Inspecting Large Orders: Sampling and Defect Severity
- Frequently Asked Questions
Last Updated: October 19, 2026
Why a Quality Check for Custom Team Gear Matters
A quality check for custom team gear is the step-by-step inspection of delivered uniforms against your order specs, covering fabric, stitching, printing, sizing, and logo accuracy.
Here's the hard truth: most bad uniform stories start with gear nobody inspected.
At Game Day Tampa Bay, we build custom uniforms and apparel for local teams. So treat this as your inspection playbook.

The good news: a full inspection takes about 30 minutes for a small roster. And it catches the problems while you can still fix them.
Build Your Custom Team Apparel Quality Checklist
Start with a written custom team apparel quality checklist before you open a single box. A checklist turns "this looks fine" into a repeatable, scored inspection anyone on your staff can run, and it gives you a paper trail if you need to file a claim later.
Your checklist should cover eight core areas:
- Fabric: weight, feel, and any visible flaws
- Stitching: seams, hems, and loose threads
- Print and embroidery: logo accuracy and placement
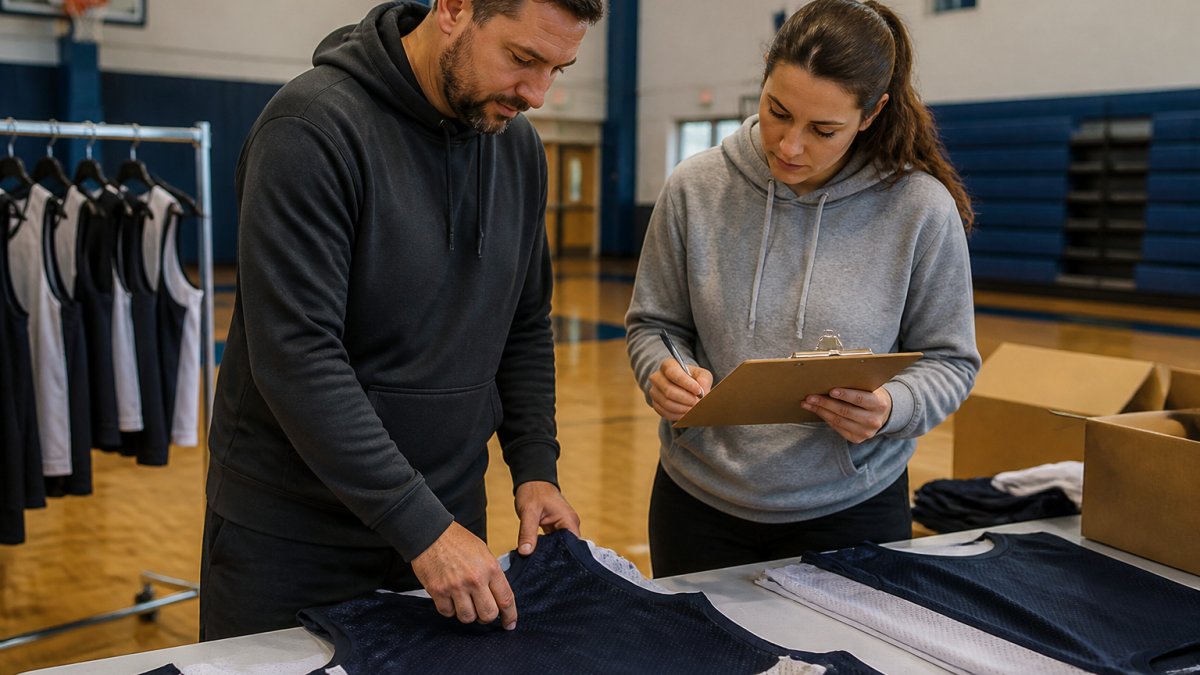
Run the Inspection in This Order
Work in a fixed sequence so nothing gets skipped. Inspect in this order: (1) count and sort by size and color, (2) fabric and color check under consistent lighting, (3) construction and seams, (4) print and embroidery, (5) names and numbers, (6) sizing against the chart, (7) finishing and packaging.
Set up one clean, well-lit table. Daylight or a high-CRI shop light beats overhead fluorescents, which can hide shade differences between dye lots. Keep the packing slip, the approved proof, and the size chart on the table so you compare against documents, not memory.
What to Inspect and How to Score It
Score each item on a simple 1-to-3 scale: 1 means reject, 2 means acceptable with a note, 3 means perfect. Anything scoring 1 gets documented and reported the same day. The key is defining what earns each score before you start, so two staffers inspecting the same jersey reach the same verdict.
Use this summary to run the inspection fast:
| Check | What to Look For | Fail If |
|---|---|---|
| Fabric | Even weight, no thin spots | See-through or rough patches |
| Seams | Straight, tight, reinforced | Gaps or skipped stitches |
| Print/logo | Sharp edges, correct colors | Peeling, cracking, off-center |
| Numbers | Correct spelling, high contrast | Wrong font or misaligned |
| Sizing | Matches size chart | Runs a full size off |
| Color | Uniform across order | Visible shade differences |
Acceptance Criteria That Make the Score Objective
A checklist only works if "fail" is defined the same way every time. Use these thresholds as your pass/fail line, and adjust them to your program's tolerance:
- Measurements: lay the garment flat and measure chest width and body length. A garment that is off by more than about half an inch from the size chart is a fail; smaller variances are a note.
- Seams: any skipped stitch, open seam, or unraveling hem is a fail. A single loose thread under an inch is a trim-and-note.
- Print and embroidery: any lifting, cracking, or peeling when you gently flex the print is a fail. Off-center placement beyond roughly a quarter inch from the approved proof is a fail.
Pro Tip
Photograph every defect with the packing slip in frame. Suppliers resolve documented claims far faster than vague "something's wrong" emails.
Turn the Checklist Into a Printable Form
You do not need software. Build a one-page form with a row per garment and a column per check (fabric, seams, print, numbers, sizing, color, finishing), plus a final pass/fail column and a notes column. Print one per size-and-color group. At the bottom, add a signature line for the inspector and the date. That single page is your record of what arrived, what passed, and what you are claiming, and it is the document a supplier will ask for when you request a replacement.
Custom Uniform Sample Approval Before Full Production
Always approve a physical pre-production sample before the full run starts. A sample is your one cheap chance to catch a wrong color, a crooked logo, or a fabric that feels nothing like what you expected.
Most quality failures are locked in before production even begins. Once 40 jerseys are printed, fixing a logo means reprinting all 40. Approving a sample first means you catch the problem when it costs one jersey, not the whole order.
Approving Artwork and Logo Placement
Check the sample against your original artwork, not your memory. Confirm:
- Logo size: does it match the proof you signed off on?
- Placement: is it centered on the chest or sleeve as agreed?
- Colors: do they match your team colors exactly?
Get written sign-off from one decision-maker before production starts. Too many cooks on artwork approval is how mistakes slip through.
Team Jersey Printing Quality: Names, Numbers, and Logos
Team jersey printing quality comes down to three things: crisp edges, correct spelling, and strong adhesion. Run your eyes and fingers over every printed element before you accept the order.
Check each jersey for these printing issues:
- Peeling or cracking: flex the print gently; it should not lift
- Blurred edges: lettering should be sharp, not fuzzy
- Color bleed: colors should not run into each other
For embroidered logos, check that the stitching is dense and even, with no puckering around the edges. Loose threads on embroidery are a red flag for weak finishing.
SUNLAKE PATCHES - SPORT AND YEAR →
Using a Custom Apparel Size Chart to Check Fit
A custom apparel size chart is your measuring stick for the whole order. Measure a few sample garments flat and compare them to the chart before you hand anything out.
Sizing is where teams get burned most. Players swap jerseys, parents complain, and suddenly you're shipping replacements mid-season. Catch it early:
- Lay each size flat and measure chest width and body length
- Compare against the size chart you ordered from
- Allow for a small measurement tolerance, but flag any size that runs a full size off
Watch Out
Never skip the wash test. Run one sample jersey through a normal wash and dry cycle. If it shrinks badly or the print cracks, you've found the problem before the whole team does.
Fabric, Stitching, and Construction Checks
Fabric and construction quality decide whether gear survives the season or falls apart in three games. Check weight, breathability, and every seam before you accept delivery.
Start with the fabric itself. Performance apparel should feel substantial, not paper-thin. Hold it up to the light: if you can see straight through it, question the fabric weight.
Then move to construction:
- Seams: straight, tight, and reinforced at stress areas like shoulders and armholes
- Stitching: no skipped stitches, loose threads, or unraveling hems
- Reinforcement: double stitching at high-stress points
- Colorfastness: no fading or bleeding, especially on dark colors
Check for shrinkage and fading before distribution. Wash one sample and compare it to an unwashed one side by side.
Inspecting Large Orders: Sampling and Defect Severity
For large orders, inspect a sample of each size and color rather than every single piece, but sample with a rule, not a guess. Pull a set number from each group, check them thoroughly, and escalate if you find defects. The goal is to decide whether the whole lot is acceptable, not to find every flaw in every garment.
Here's a practical sampling approach:
- Pull at least 10% of each size and color combination
- Inspect every piece in small orders under a dozen
- Sort defects by severity: critical (unwearable, wrong logo), major (visible flaw), minor (cosmetic)
- Document each defect with a photo and count
How Many Pieces to Inspect
A 10% pull is a starting point, not a rule. Scale the sample to the stakes:
- Under 12 pieces: inspect every garment. At this size, a full check is faster than sampling.
- 12 to 50 pieces: inspect at least 10% of each size and color, with a minimum of three pieces per group.
- 50 to 200 pieces: inspect at least 10% per group, and add a second pass on any group where you find a critical defect.
- Over 200 pieces: inspect at least 10% per group and pull a random cross-section from multiple cartons rather than the top layer of one box.
Select samples randomly, reach into different cartons and pull from the middle, not the top. Suppliers and factories often pack the best pieces on top, so a top-layer sample can hide a bad run underneath.
Set an Acceptance Number Before You Start
Decide in advance how many defects you will tolerate before rejecting a group. A common pattern is to accept a group only if you find zero critical defects and no more than one major defect in your sample; anything beyond that triggers a full inspection of the group. Write the number down before you open the boxes so the decision is not a judgment call in the moment.
Defect severity guide:
| Severity | Example | Action |
|---|---|---|
| Critical | Wrong name, peeling logo | Reject, report now |
| Major | Crooked number, bad seam | Request replacement |
| Minor | Loose thread, small mark | Note and monitor |
Key Takeaway
Document everything in writing with photos. A clear defect log is your use if a supplier pushes back on replacements.
Document Defects and Resolve Them With the Supplier
A failed inspection is only useful if it turns into a fix. Work the claim in this order:
- Photograph each defect with the packing slip and a size tag in frame, so the supplier can see exactly which piece and which group is affected.
- Log the count, how many pieces inspected, how many failed, and at what severity, on the same form you used for the checklist.
- Notify the supplier in writing within the window your order terms allow. Many suppliers set a short claims window, so report critical defects the same day you find them.
- Request a specific remedy: replacement of the affected pieces, a reprint of the group, or a credit. Be explicit about which pieces and how many.
- Keep the rejected pieces until the claim is resolved; do not distribute or discard them, or you lose your evidence.
When you choose a manufacturer, reliability matters as much as price. Ask about quality control steps and turnaround time before you commit. For teams that want gear ready before the season, working with a vendor that confirms delivery details up front takes the guesswork out of ordering. You can explore Federal Trade Commission guidance on shopping rights if a supplier fails to deliver what was promised.
Frequently Asked Questions
How do you inspect custom team apparel before approving an order?
Lay out a sample from each size and check four things: fabric weight and feel, seam alignment, print or embroidery accuracy, and measurements against the size chart. Run a light stretch test on stress areas like shoulders and side seams. Confirm names and numbers match your roster exactly. Do this before the full order ships, not after, so any defect gets fixed at the supplier's cost. Keep written notes and photos of anything that fails so you have a record for the supplier conversation.
What should you check on a custom uniform sample?
Start with the custom uniform sample approval stage and treat it as your one chance to catch problems. Check logo size and placement against the approved artwork, color accuracy under daylight, stitch density at seams, and whether the fabric matches the swatch you approved. Wash the sample once to test for shrinkage and fading. Measure it flat and compare to the custom apparel size chart. If anything is off, request a corrected sample before production starts on the full run.
How can you make sure team names and numbers are printed correctly?
Team jersey printing quality comes down to a roster cross-check. Build a spreadsheet with player name, number, and size, then verify each garment against it one by one. Check that lettering is high-contrast against the fabric, that numbers are centered and level, and that no print is peeling or cracked at the edges. For sublimation, confirm colors did not bleed into the fabric grain. Photograph each finished jersey flat so you have proof if a mistake slips through.
What should you do if custom uniforms arrive with defects?
Document everything first: photograph the defect, note the player name or size, and record the date received. Sort defects by severity so minor loose threads do not get mixed with ripped seams. Contact the supplier within their stated window with your photos and order numbers, and ask for repair, replacement, or credit in writing. For large orders, count how many units failed and report the rate, not just the individual cases. Keep one defective unit as a reference until the issue is resolved.


